

This article was co-authored by Jefferson Tavares de Pádua and Mohamed Sharaf, members of the Whitespectre React Native team.
What you’ll find in this article:
- What Can I Do to Keep my Data Secure?
- How to Implement SSL Pinning in React Native?
- Getting the Public Keys
- Android Specific Implementation
- iOS Specific Implementation
- How to Test that SSL Pinning is Working on Different Testing Environments?
- Watch Out When You Include SSL Pinning into Your Application
If you’re a developer in today’s highly interconnected world, chances are you’ve probably built an app that consumes data from an API to allow users to have their content available no matter where they are, right? But did you ever consider the possibility that someone else might also be getting that data, not just your end user?
Yes, that’s actually possible, and if you are surprised chances are someone’s probably doing it. But not anymore! In this article we’re going to show you how to add an extra layer of security in a React Native application and also how to test it to make sure everything works as expected. Excited? Then let’s get into it.
What Can I Do to Keep My Data Secure?
When communicating with an API you’re constantly sending and receiving information that in most cases is private to the context of the user requesting it. These payloads of data being moved back and forth between app and server not only contain user sensitive information, but they also expose the behavior of your application, and by having access to it, a malicious person can start reverse engineering your business logic to prepare an attack and/or try to scam your users.
But I’m using HTTPS to communicate with the server - says the developer.
Well, HTTPS can indeed help prevent an attacker from having access to the content of the request as it is being transported from the server to the client, but it doesn’t prevent an attacker that has violated the user’s device from actually reading the contents of the requests.
That means that even if you’re using HTTPS, if someone sets up let’s say a proxy between your user’s phone and your server, they can still read your server’s data, and of course we want to prevent that from happening. That’s where SSL Pinning comes into play, because once your application is pinned to the certificate of your server, if someone tries to sneak in the middle of the connection to read those requests, the communication will stop immediately, so the attacker won’t be able to keep track of your app’s content.
How to Implement SSL Pinning in React Native?
Now that you understand what SSL Pinning can add to your application you’re probably wondering how to implement this into your app, right? Well, if you do a Google search around this topic (which is probably how you ended up here) one of the top results is going to be a library called react-native-ssl-pinning, which can be used to achieve the behavior we just described. But hold on, don’t close the tab just yet, because that library works on top of the fetch method that’s available on React Native, and if you have an application that’s already being used by people, chances are you’re probably using another client to send send requests (e.g axios) and that library doesn’t allow to switch from fetch to a different client.
There are also a few other libs that are trying to solve this same problem, but they come with their own issues, and most don’t have enough support to be considered as an alternative for a real world application. With that said, unless you’re starting an app from scratch and fetch can fit all your needs, the best solution is to add SSL Pinning natively in the platforms your app is going to be used, so that every time a request is sent on the JS layer, the underlying native networking implementation that gets executed on Android/iOS uses SSL Pinning.
Getting the Public Keys
Now that we’re on the same page, let’s get our hands dirty and implement this. First things first, we need to get the certificates from the domain we’re going to be pinning. So step 1 is to use the command below to show the certificates available for the domain:
openssls_client-showcerts-servernameYOUR_DOMAIN.COM-connectYOUR_DOMAIN.COM:443This command will output all the certificates available, so now you need to store them for us to use later. A
certificate starts with -----BEGIN CERTIFICATE----- (prefix) and ends with
-----END CERTIFICATE----- (suffix) you have to copy all the content (including the prefix and
suffix) and store to a separate file with the .pem extension. Please do that for all certificates available
(and of course create a file for each one of them).
Once that’s done, in step 2
we’ll convert the certificates we got in step 1 to base64 so we can use them on our code. To do that, simply run the command below and copy the output to be used later:
opensslx509-inPATH_TO_YOUR_CERTIFICATE.pem-pubkey-noout|opensslrsa-pubin-outformder|openssldgst-sha256-binary|opensslenc-base64Android Specific Implementation
Now that we have the certificates, it’s time to use them in our code. Let’s see how to set it up
on Android first. The default underlying network implementation of React Native on Android is the OkHttp library, which provides us with a way to use SSL Pinning
by creating a class that implements the OkHttpClientFactory interface.
The main takeaways here is that if you want all of your subdomains to also be pinned (recommended) you can do
that by including the **. to your hostname. Also make sure to call .add in the
_CertificatePinner.Builder()_ for each one of the keys you’ve encoded to base64 in step 2.
Now we just need to include this class in our call stack (this has to done as one of the first things inside
of your MainActivity), we can do that by calling:
OkHttpClientProvider.setOkHttpClientFactory(newCertificatePinningFactory());A pro tip here is that if you probably still want to watch the requests happening during development, you can
use the value from BuildConfig.FLAVOR to conditionally enable the code above, so it’s only
used in the release versions of the app.
iOS Specific Implementation
For iOS the implementation is also straightforward, and we’ll use a library called Trustkit which allows us to pin the requests happening at
the native iOS level. To use Trustkit you first need to include it in the project, so open your Podfile and
add pod 'TrustKit' inside of the targets you want to use SSL Pinning.
Once that’s done, go over to the AppDelegate.m file and add the code below and remember to include all
the keys you got on step 2 inside the array of kTSKPublicKeyHashes.
The implementation here’s is relatively similar to the one of Android, so keep an eye on:
kTSKIncludeSubdomainsand change the value between @YES or @NO in case do/don’t want your subdomains to be pinned,kTSKEnforcePinningwhich will completely fail all requests in case the domain is not properly validated (recommended)
Well, that’s basically it. It’s all working! Just push it to production and go get a mug of coffee. A bit skeptical? Yeah, I think it’s best if we learn how to test this first.
How to Test that SSL Pinning is Working on Different Testing Environments?
There are several tools used mainly to intercept API calls made from mobile devices to their target endpoints and below are the most common:
- ProxyMan
- Burp suite Community
- Charles Proxy
Below, we will go through configuring the proxy servers for proxyman and burp suite as charles proxy is pretty much similar to proxyman.
1. Proxyman (Available only on macOS)
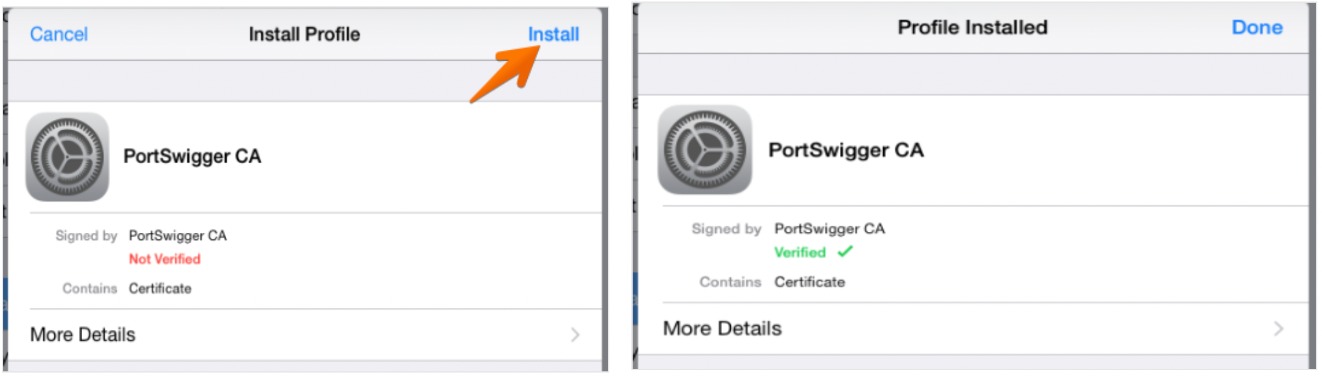
Configure the CA certificate on iOS
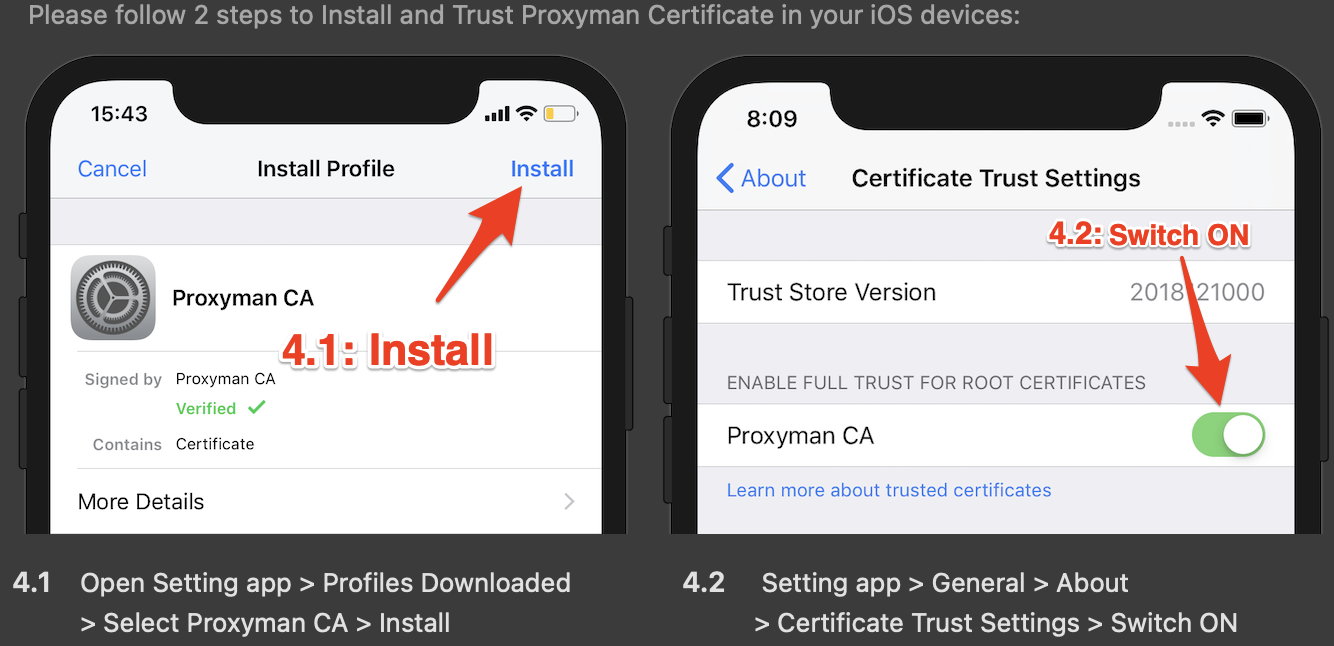
- You are now ready to start intercepting and seeing API requests made by all the applications on the mobile device.
- Checking requests on proxyman can be as easy as just going through different apps on your mobile device.
- Any request made from the app will show up on proxyman categorised by target URL. for example: opening www.apple.com on any of the browsers.
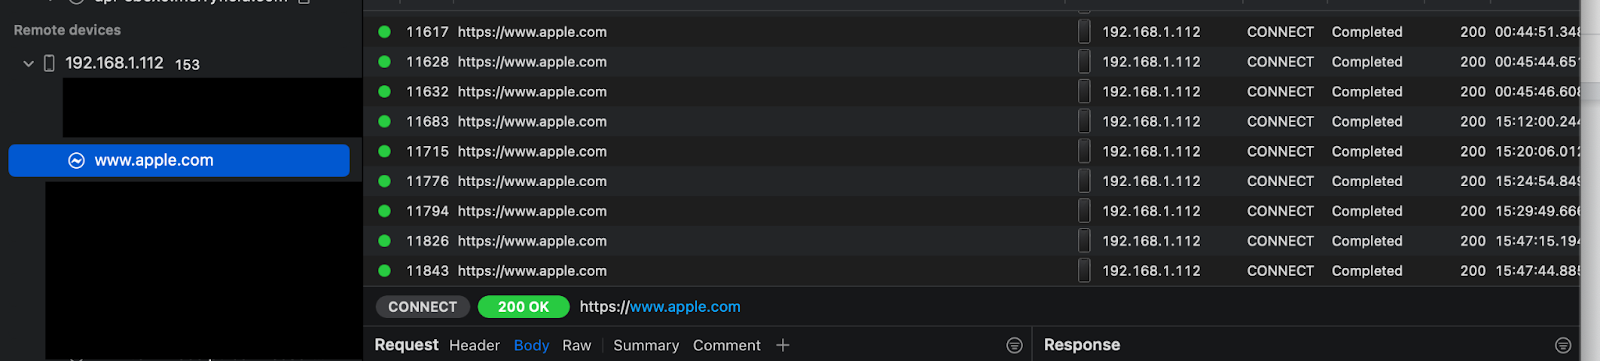
- That should generate a GET request to the URL
- To decrypt the SSL encryption, right click on the URL from the left and choose “Enable SSL proxying”
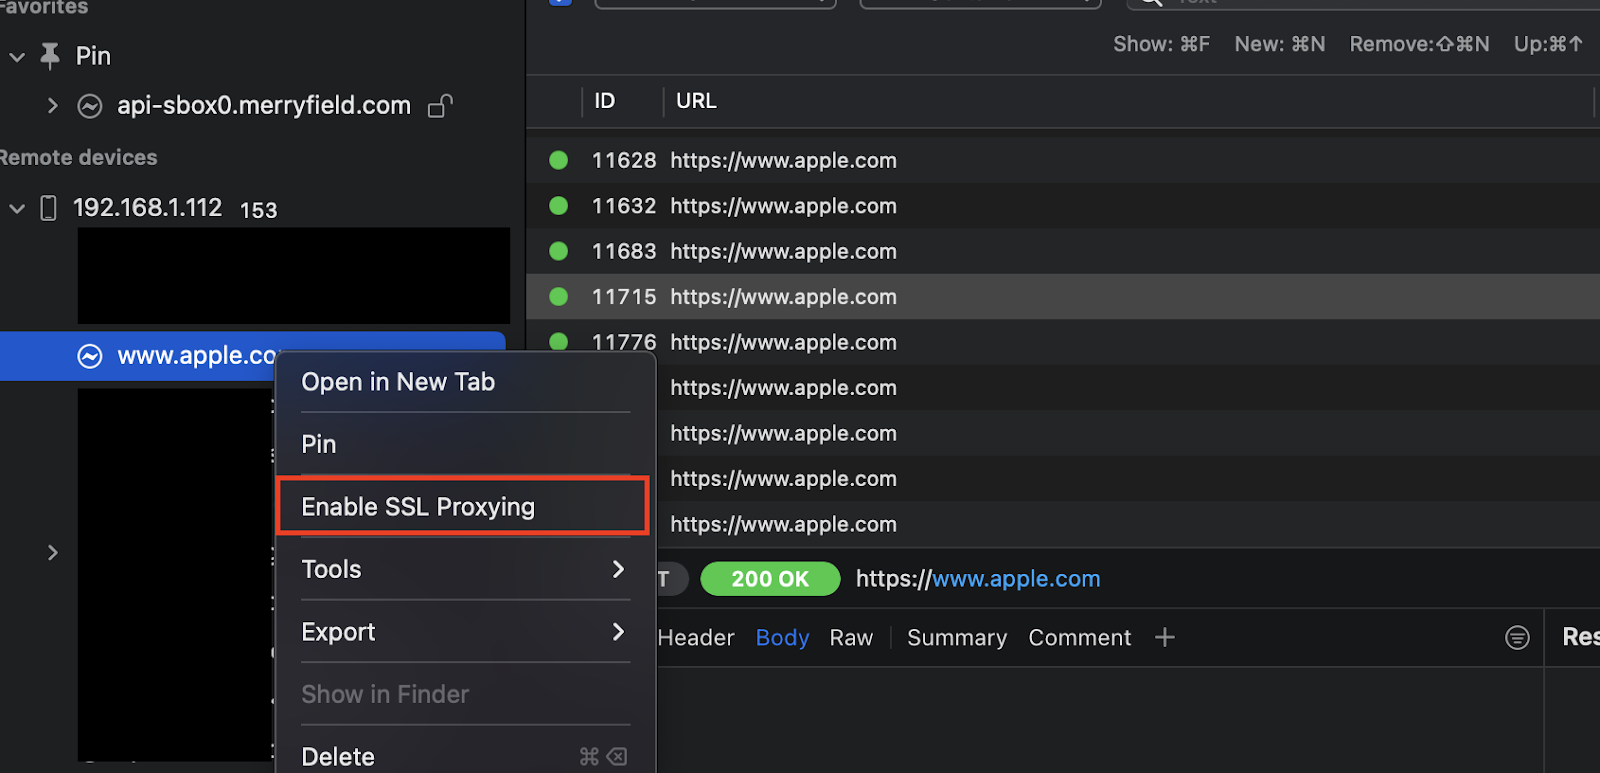
- Once you choose that option, if SSL pinning is working fine, all requests to the endpoints should fail.
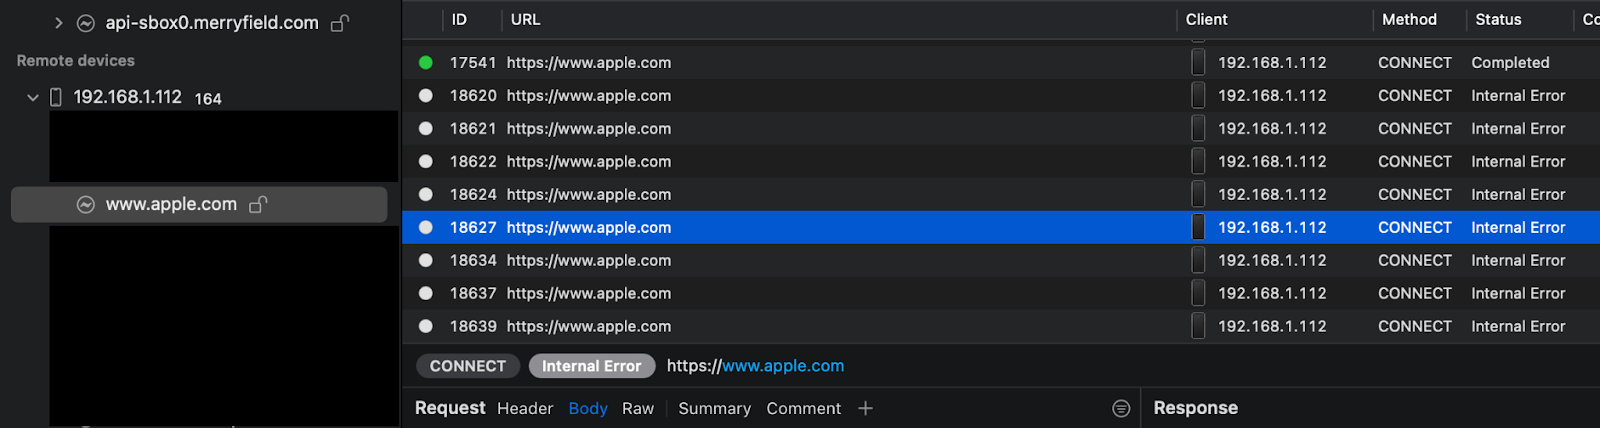
- Below are the points to verify while testing the SSL pinning functionality:
- All requests to the endpoint should fail while SSL pinning is active.
- All request contents should be hidden (Body + headers)
- Response shouldn’t be displayed
2. Burp suite community
Configure the CA certificate on iOS
- On the burp suite, Go to proxy tab
- Press add button and add the current local IP and port 9090
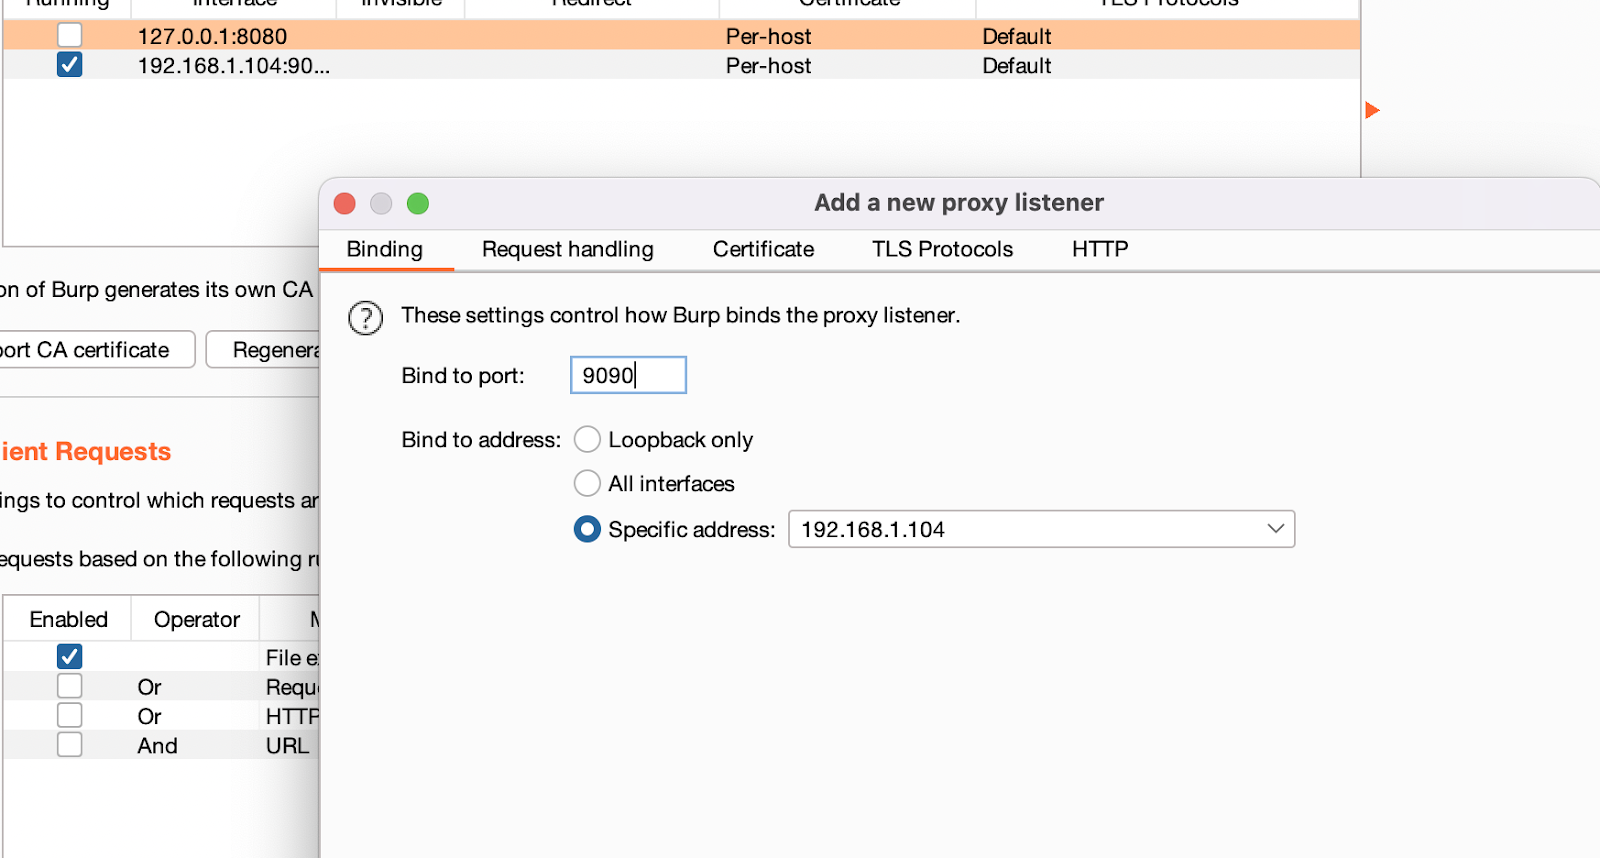
- You are now ready to start intercepting and seeing API requests made by all the applications on the mobile device.
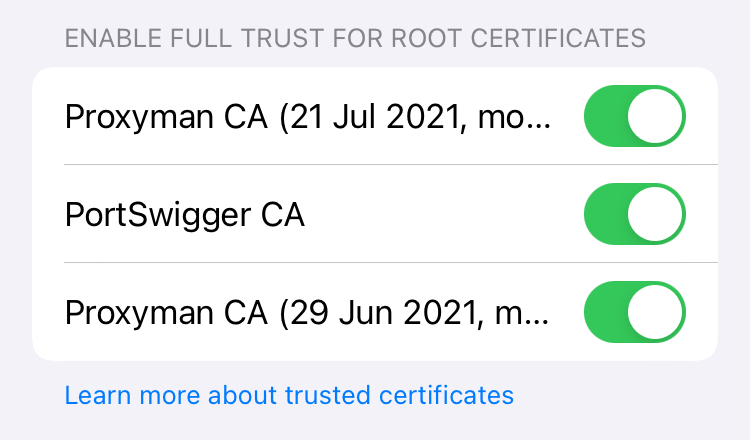
- SSL proxying on Burp is enabled by default so there is no need to do any extra steps. Just enable the certificate from iOS General settings > About > Certificate trust settings
- Checking requests on burp is done by following the below steps:
- On burp, since SSL proxying is enabled by default, any failed request shouldn’t show up and the applications that have SSL Pinning protection, shouldn’t work or be capable of doing any requests to the backend.
Watch Out When You Include SSL Pinning into Your Application
One thing that you must be aware of when SSL Pinning is enabled is that if it fails, the user will not be able to get any data from your domain. So you must keep an eye on the expiration date of the certificates you include into your chain, and always make sure that there’s at least one backup pin in the list, otherwise you’ll run into a lot of trouble having to push a hotfix because no one can access your service.