
When we started working on the new website for our client SpotOn, the key challenge was how to highlight and explain their unique virtual fencing technology. Not only did we need to make complex concepts simple, we also needed to do it in a way that would match the premium experience associated with their product.
Early on, we saw that scroll animations would be a great way to help achieve these goals. In the words of our UX/UI lead Andy Simpson:
Adding animations to how the page is viewed and interacted with raises this perception of quality. It also serves as an additional tool to create priority and communicate a message - very useful for a product introducing cutting edge technology.
In this article, we are going to show you the different tools we used to achieve the animations on the site and why they are an important part of the experience.
Entrance Animation
Entrance animations occur when the user scrolls content into view. These were kept very simple with subtle horizontal or vertical movement combined with an opacity change. This creates the impression the page is building as it comes into view. As the key marketing pages are quite long with a lot of vertical scrolling, this helps bring the page to life and add that extra level of interest.
For this, we are going to introduce our first and main tool: ScrollMagic. ScrollMagic allows to set a position during scroll that will trigger an animation.
let controller = new ScrollMagic.Controller();
new ScrollMagic.Scene({
  triggerElement: ".section",
  triggerHook: 0.5
})
  .setClassToggle(".section", "active")
  .reverse(false)
  .addTo(controller);
We start by creating a ScrollMagic controller. After that we create the “scene”, triggerElement and triggerHook let us set the section that will trigger the action and where that section should be positioned on the viewport. In this case is the middle of the screen. setClassToggle is the action in this case, just adding a class to the section. reverse simply avoids removing the class once we scroll up. Finally, we add the scene to the controller.
Because this is a simple animation, we can just use vanilla CSS:
.section {
  opacity: 0;
  &.active {
    transition: opacity 0.5s ease-out;
    opacity: 1;
  }
}
Visual Fence Animation
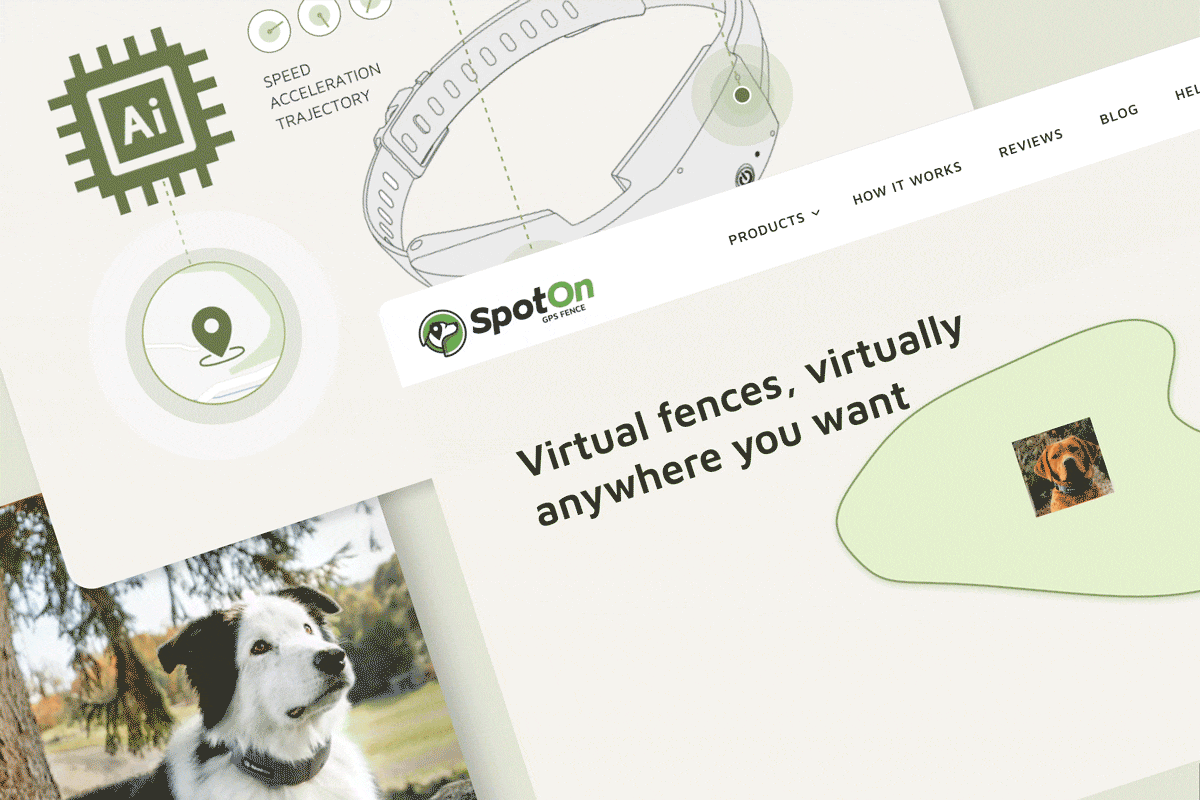
The purpose of this animation was to communicate the brand’s theme of freedom. With the SpotOn GPS Fence, your dog doesn’t need to be on a leash and confined to a small enclosed space. We replicate this in the animation by starting out with the dog’s profile in a small container and on scroll, expanding out to reveal the dog unleashed and in the middle of full screen landscape. The 4 key benefits of the collar then cascade into view, really hitting home the message.
This animation is slightly more complex than the last one, because here we not only start the animation when the user reaches a certain point, but also, is the user scroll what controls the animation.
new ScrollMagic.Scene({
  triggerElement: ".section",
  triggerHook: "1",
  duration: 750,
})
  .setPin(".section")
  .setTween(timeline)
  .addTo(controller);
Besides triggerElement and triggerHook, here we add the duration of the scene. This is the amount of pixels scrolled that the scene is going to last. Also, we add setPin which will put an element fixed in the screen during the scene.
The new element here is setTween. Tweenmax (now
let elementAnimation = TweenMax.to(".section-bg", 50, {
  width: "100%",
  height: "100%",
  top: 0,
  left: 0,
});
let backgroundAnimation = TweenMax.fromTo(
  ".section-bg",
  50,
  { backgroundPosition: "70% 42%", backgroundSize: "908% auto" },
  { backgroundPosition: "50% 50%", backgroundSize: "100% auto" }
);
let timeline = new TimelineMax();
timeline.add([
  elementAnimation,
  backgroundAnimation
]);
Here, there are two animations, one to change the size of the container and one to resize the background image. The second parameter (50) means that the animation will take half the duration of the scene. Because the scene duration is based on pixels scrolled instead of time, this means that the animation would be interactive, and it will reproduce with the scroll of the user. Finally, we just merge all these animations in a timeline and add it to the scene as we show above.
Tech Animation
As the SpotOn GPS Fence has such advanced tech, communicating this to a new user is challenging. The animations are designed to help the user visually understand the various tech abilities and benefits of the product. There is also a lot of information to impart on the user, so breaking this into bite size chunks with an on scroll animation for each helps keep the users interested and digest the information at their own pace.
This is a quite similar scenario as the last one. The main difference here is that we need to animate a graphic element. Luckily, with Lottie and Bodymovin, this becomes quite easy. The first one is a library that lets UX designers export After Effects animations as a JSON which then can be animated on the web with the second library.
const animationData = {
  container: animationcontainer,
  renderer: 'svg',
  autoPlay: false,
  loop: true,
  name: 'techAnimation',
  path: 'animation.json'
};
const graphicAnimation = bodymovin.loadAnimation(animationData);
Here we load the animation in a container, which as we said earlier, is a json file exported by the designer. After it’s loaded, we can make it interactive.
graphicAnimation.addEventListener('DOMLoaded', onAnimationLoaded);
function onAnimationLoaded(e) {
  let graphicTween = TweenMax.to({
    frame: 0
  }, 10000, {
    frame: graphicAnimation.totalFrames - 1,
    onUpdate: function() {
      graphicAnimation.goToAndStop(Math.round(this.targets()[0].frame), true)
    },
    ease: Linear.easeNone
  })
  const timeline = new TimelineMax();
  timeline.add([
    graphicTween,
  ]);
  let scene = new ScrollMagic.Scene({
    triggerElement: ".section",
    triggerHook: "onLeave",
    duration: '400%',
  })
    .setPin(".section")
    .setTween(timeline)
    .addTo(controller);
}
The code is basically the same that we had in the previous animation. The main difference is in the “tween” creation where we need to add some code to make the Lottie that we created interactive.
Animations like this always look tricky but with all the libraries here introduced we showed that it can be quite simple to implement. Also, it’s something that really adds to the experience of the site, especially when you have a product that has a lot of features and technologies that must be highlighted.
Thanks for reading to the end! If you liked this post, follow us on @whitespectrehq or LinkedIn and stay tuned for more. And if you try this out, let us know - we’d love to hear your feedback.